
Blow Molding vs Rotational Molding: How to Choose

Choose blow molding for smaller hollow parts, such as bottles, drums and ducts, made in high volume, where cycle time and unit cost decide the job. Choose rotational molding for large or complex hollow parts at low to mid volume that need even walls through the corners, molded-in inserts and lower tooling cost. Part geometry and annual quantity usually settle it.
TL;DR
- Blow molding wins on cycle time and unit cost once annual volume is high. Cycles run from seconds to about a minute.
- Rotational molding wins on part size, even walls through the corners, molded-in inserts and tooling cost at low to mid volume. Cycles run 30 minutes or more.
- Part geometry and annual quantity usually decide the process before piece price does.
- Published break-even estimates range from roughly 3,000 parts a year to well over 10,000, so run the cost model against your own part.
- Injection molding and thermoforming beat both processes for some parts, and the comparison should include them when the part is open-sided or very high volume.
Both processes make hollow plastic parts, both run polyethylene more than any other resin, and they fail in opposite ways. Blow molding struggles when a part gets large, needs thick even walls or has to carry metal inserts. Rotational molding struggles when volume climbs into the tens of thousands, when walls need to be thin and light, and when a dimension has to hold a tight tolerance.
Most of the trouble starts when the process gets picked on piece price before anyone checks the part against those limits. A quote that looks cheaper per unit can come with a mold the program cannot afford to change, or a wall that thins out exactly where the part takes its hardest hits in the field.
This guide walks through how each process forms a part, puts the two side by side across the factors that decide most programs, and ends with a short decision sequence you can run against your own drawing and volume estimate. It is written by CPI Products, a custom rotomolder in Port Washington, Wisconsin, which means it also covers the cases where rotomolding is the wrong answer.
What is blow molding, and where does it win?
Blow molding forms a hollow part by inflating a softened plastic tube or preform with compressed air inside a cooled, closed mold. The air pushes the plastic against the mold wall, the part cools in seconds, and the mold opens for the next shot. That speed is why blow molding owns high-volume hollow parts.
Defined Term: Parison
The hollow tube of molten plastic extruded downward between the open halves of a blow mold. The mold closes on it, pinches off the bottom, and compressed air expands it to the shape of the cavity.
There are three common variants, and they serve different markets:
- Extrusion blow molding (EBM): a parison is extruded, captured by the mold and inflated. This covers most industrial parts: drums, fuel tanks, ducts, seat backs, and the inner bottles of intermediate bulk containers (IBCs).
- Injection blow molding (IBM): a preform is injection molded on a core rod, then transferred to a blow mold. It holds very precise neck finishes and suits small bottles and vials.
- Injection stretch blow molding (ISBM): a preform is stretched and blown, which orients the polymer for strength and clarity. This is how most PET beverage bottles are made.
Blow molding is usually the right process when most of these are true:
- The volume is high. Cycle times measured in seconds spread the cost of an expensive mold across a very large number of parts.
- The part is small to mid-sized. Bottles, containers, ducts and drums sit squarely in its range.
- The wall can be thin and light. Pressure forming produces lighter parts with less resin per unit.
- A threaded neck or opening needs precision. IBM and EBM both form necks and openings to tight dimensions.
- The part has to be clear. Stretch blow molding PET is the standard route to transparent hollow parts.
Blow molding has real limits. Wall thickness varies with how far the parison stretches, so walls thin at corners and at the far reaches of the cavity unless the parison is carefully programmed. Every part carries a pinch-off seam where the mold closed on the parison. Molds have to withstand clamping force and blow pressure, which makes them more expensive and slower to change. Very large parts need very large, expensive machines, which is why blow-molded parts top out around drums and IBC bottles.
What is rotational molding, and where does it win?
Rotational molding (rotomolding) forms a hollow part by tumbling powdered resin inside a heated mold that rotates on two axes, then cooling the mold while it keeps turning. There is no pressure anywhere in the process. The resin melts and coats the inside of the mold layer by layer, which is what produces its even walls.
A rotomolding cycle runs in four stages:
- Load: a measured charge of powdered resin, most often polyethylene, goes into a cold mold, and the mold closes.
- Heat: the mold enters an oven and rotates on two axes, so the powder melts and builds up evenly on every interior surface.
- Cool: the mold moves to a cooling station and keeps rotating while the part solidifies, which keeps the wall from sagging.
- Demold: the part comes out, and the mold is recharged for the next cycle.
Defined Term: Biaxial rotation
Rotation of the mold on two perpendicular axes at the same time. It is what lets an unpressurized melt reach every surface of the cavity and build a consistent wall, including through outside corners.
Rotational molding is usually the right process when most of these are true:
- The part is large. Rotomolded tanks routinely run into thousands of gallons, a scale blow molding does not reach.
- Volume is low to mid. Hundreds to low thousands of parts a year is where rotomolding’s lower tooling cost outweighs its longer cycle.
- The wall has to be even and thick. Rotomolded walls stay consistent through corners and edges, and outside corners tend to build material.
- The part needs molded-in features. Metal inserts, threaded bosses and mounting points can be placed in the mold and captured by the melt.
- The part takes abuse in the field. With no forming pressure, rotomolded parts carry very little molded-in stress, which helps impact performance.
- The design may still change. Cast aluminum and fabricated steel molds cost less and are faster to modify than pressure-rated tooling.
The limits are just as real. Cycles of 30 minutes or more make rotomolding expensive at high volume. Tolerances are looser than in pressure-formed processes, because the part shrinks away from an unpressurized mold wall as it cools. Very thin walls are hard to achieve, and the resin list is narrower, with polyethylene doing most of the work. For a full walkthrough of the process, see Rotational Molding: A Complete Guide to the Process.
How do blow molding and rotational molding compare side by side?
Blow molding beats rotational molding on speed, unit cost at volume, thin walls and tight tolerances. Rotational molding beats blow molding on part size, wall uniformity, tooling cost, molded-in inserts and low molded-in stress. The table compares the two across the factors that decide most programs.
| Factor | Blow molding | Rotational molding |
|---|---|---|
| How the part forms | Compressed air inflates a parison or preform against a cooled mold | Powder melts onto the inside of a heated mold rotating on two axes, with no pressure |
| Typical cycle time | Seconds to about a minute | 30 minutes or more |
| Annual volume fit | High volume, tens of thousands of parts and up | Low to mid volume, hundreds to low thousands of parts |
| Part size | Small to mid-sized, up to drums and IBC bottles | Small to very large, including tanks of thousands of gallons |
| Wall thickness control | Thins where the parison stretches furthest; controlled by parison programming | Even wall through corners and edges; outside corners tend to build material |
| Dimensional tolerance | Tighter, especially at molded necks and openings | Looser, roughly ±0.010 to ±0.020 inch per inch on polyethylene |
| Tooling | Machined to withstand clamping and blow pressure; higher cost, longer to build and slower to change | Cast aluminum or fabricated steel; lower cost, generally quicker to build and modify |
| Molded-in stress | Present, from stretching and pressure forming | Very low, since nothing is forced into shape |
| Metal inserts | Limited | Can be molded in place |
| Common resins | HDPE, PP, PET, PVC | Polyethylene (LLDPE, HDPE, crosslinked PE), with nylon, polypropylene and PVC plastisol for specialty parts |
| Seams | Pinch-off seam where the mold closes on the parison | No pinch-off; a parting line only |
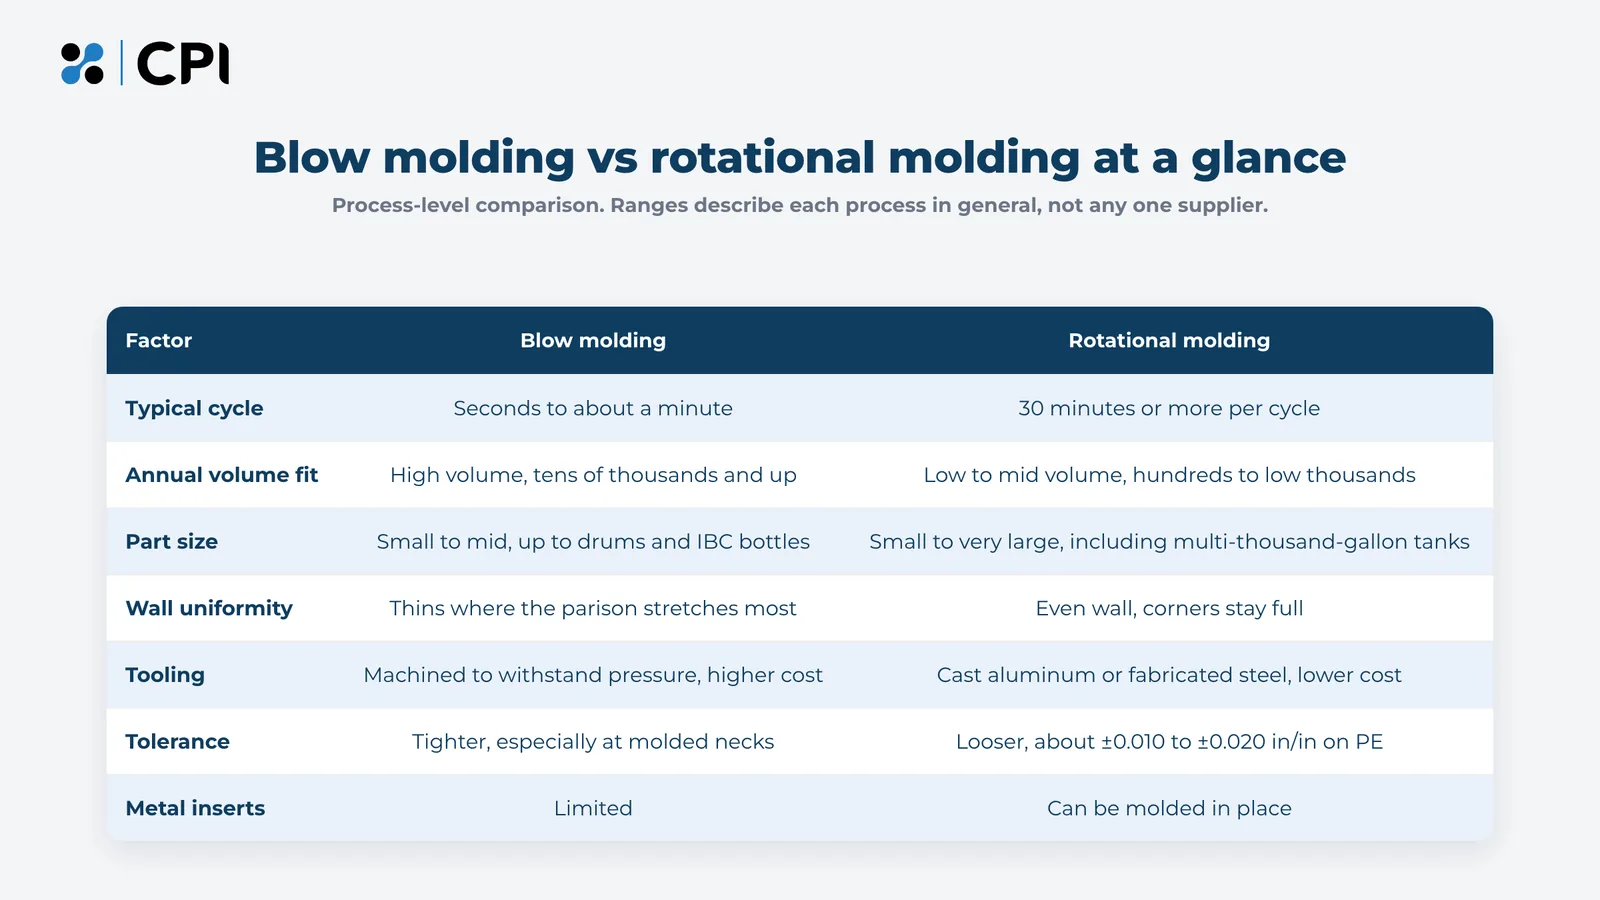
Read the table as a set of filters. One row usually eliminates a process outright. A 1,500-gallon tank cannot be blow molded on any practical machine, and 200,000 identical bottles a year will never be economical on a rotomolding cycle. The remaining rows decide the close calls.
How do part size and geometry decide between the two?
Part size and geometry eliminate one process before cost enters the conversation more often than any other factor. Start with the largest dimension, the wall the part needs, and the features that have to be molded in, because each one has a hard limit in one process and a soft limit in the other.
Start with the largest dimension and the volume of the part
Write down the part’s largest dimension and its internal volume. Blow molding handles small and mid-sized hollow parts well, and the largest blow-molded parts are typically drums and IBC bottles. Above that scale, the machine and mold cost climb steeply. Rotomolding has no such ceiling in practice: the same process that makes a small housing makes a multi-thousand-gallon tank, with the mold and oven sized to fit.
Check where the wall has to be thickest
Mark the places where the part takes load, impact or wear. In blow molding, the wall is thinnest where the parison stretched the most, which is usually the corners and the areas furthest from the parison’s center. Those are often exactly the places that take the hits. In rotomolding, material tends to build at outside corners, so the wall is at least as thick at the edges as on the flat panels. If the part’s weak points line up with blow molding’s thin spots, that alone can decide it.
List every feature that has to be molded in
List the inserts, threaded bosses, mounting points, kiss-offs and double walls the part needs. Rotomolding can capture metal inserts placed in the mold before the cycle starts, and it can produce double-walled and foam-filled constructions. Blow molding handles some of these, such as kiss-off ribs that join two walls, but heavy metal inserts are difficult. Each feature that only one process can make cleanly moves the decision toward it.
How does annual volume change the economics?
Annual volume changes the economics because the two processes spend money in opposite places. Blow molding front-loads cost into expensive, pressure-rated tooling and then makes parts very quickly. Rotational molding spends less on tooling and more on every cycle. The crossover point depends on the part, and published estimates from manufacturers that run both processes range from roughly 3,000 parts a year to well over 10,000.
That spread exists because part size, wall thickness and resin all move the line. A large, thick part takes longer to rotomold and more resin to blow mold, and both shift the break-even. The reliable way to find where your part lands is a two-line cost model.
Build a two-line cost model before you request quotes
Set up a simple model for each process with three inputs and one formula:
- Tooling cost: the one-time cost of the mold or molds, including any secondary fixtures.
- Unit cost: resin, cycle time and labor per part, from the supplier’s quote.
- Program volume: annual quantity multiplied by the number of years the part will run before a redesign.
- Total program cost: tooling cost plus unit cost multiplied by program volume.
Run the formula for both processes and plot total program cost against volume. The point where the two lines cross is your break-even. If your realistic program volume sits well below the crossing, rotomolding is cheaper over the life of the part. If it sits well above, blow molding is.
Add the cost of a design change
Most early programs change the part at least once. Add one realistic design revision to each model: a mold modification or a new cavity. Rotomolding molds are generally cheaper and faster to modify, so a program with an unsettled design often favors rotomolding even when the base model is close. If the design is frozen and validated, leave this line out.
Plan for the volume you will actually reach
Use the volume the program is likely to reach in its first two to three years, and treat a forecast that depends on winning several new customers as an upside case. Many programs start on rotomolding at launch volume and move high-runners to blow molding once the volume is proven and the design is stable. Planning for that path up front keeps the first mold from being over-built.
How do wall thickness and tolerance compare?
Blow molding holds tighter dimensional tolerances, especially at necks and openings, while rotational molding holds a more even wall. Rotomolding tolerances are looser because the part forms without pressure and shrinks away from the mold wall as it cools.
For polyethylene, the Association of Rotational Molders’ design guidance puts commercial tolerances around ±0.020 inch per inch, with precision tolerances near ±0.010 inch per inch achievable with quality tooling and tightly controlled processing. Those figures describe the process. Holding the tighter end of that range depends on the part, the mold and the molder.
Design rotomolded parts around shrinkage and warpage
Polyethylene shrinks noticeably as it cools, and in rotomolding nothing holds the part against the mold while it does. Large flat panels are the most prone to warpage. Add ribs, crowns or contours to break up flat areas, keep wall thickness consistent across the part, and give critical dimensions a datum the molder can control. Plan to machine any feature that needs a tolerance tighter than the process holds.
Specify blow-molded walls with the stretch in mind
In extrusion blow molding, wall thickness at any point depends on how far the parison stretched to get there. Parison programming can vary the extruded wall to compensate, but it cannot fully even out a deep draw. Call out a minimum wall at the critical locations on the drawing, and ask the molder where the thinnest points will fall before the mold is cut.
Match the tolerance to the function
Before choosing a process on tolerance, check which dimensions actually need it. A tank’s overall length rarely needs a tight tolerance. The mounting pattern that bolts it to a frame does, and molded-in inserts or post-mold machining can hold that pattern even on a rotomolded part.
Which process handles inserts, stress and secondary features better?
Rotational molding handles molded-in metal inserts, double walls, foam fill and low molded-in stress better than blow molding. Blow molding handles thin walls, clear parts, precision necks and multilayer barrier constructions better than rotational molding. The feature list on the drawing often settles a close call.
Rotomolding’s advantages here come from the absence of pressure:
- Molded-in inserts: threaded metal inserts and mounting hardware sit in the mold and are captured by the melt, which removes a secondary assembly step.
- Low molded-in stress: the resin is never stretched or forced into shape, so finished parts carry very little residual stress, which helps them resist cracking under impact and load.
- Double walls and foam fill: rotomolding can produce double-walled parts and parts filled with foam for stiffness or insulation.
- Even, full corners: material builds at outside corners, which is where many parts take their hardest hits.
Blow molding’s advantages come from pressure and speed:
- Thin, light walls: less resin per part, which matters at high volume.
- Precision necks and openings: threaded closures and spouts are formed to tight dimensions.
- Clarity: stretch blow molding PET produces transparent parts.
- Multilayer barriers: coextrusion blow molding builds walls with several layers, which is how plastic fuel tanks are made.
Which is right for your part?
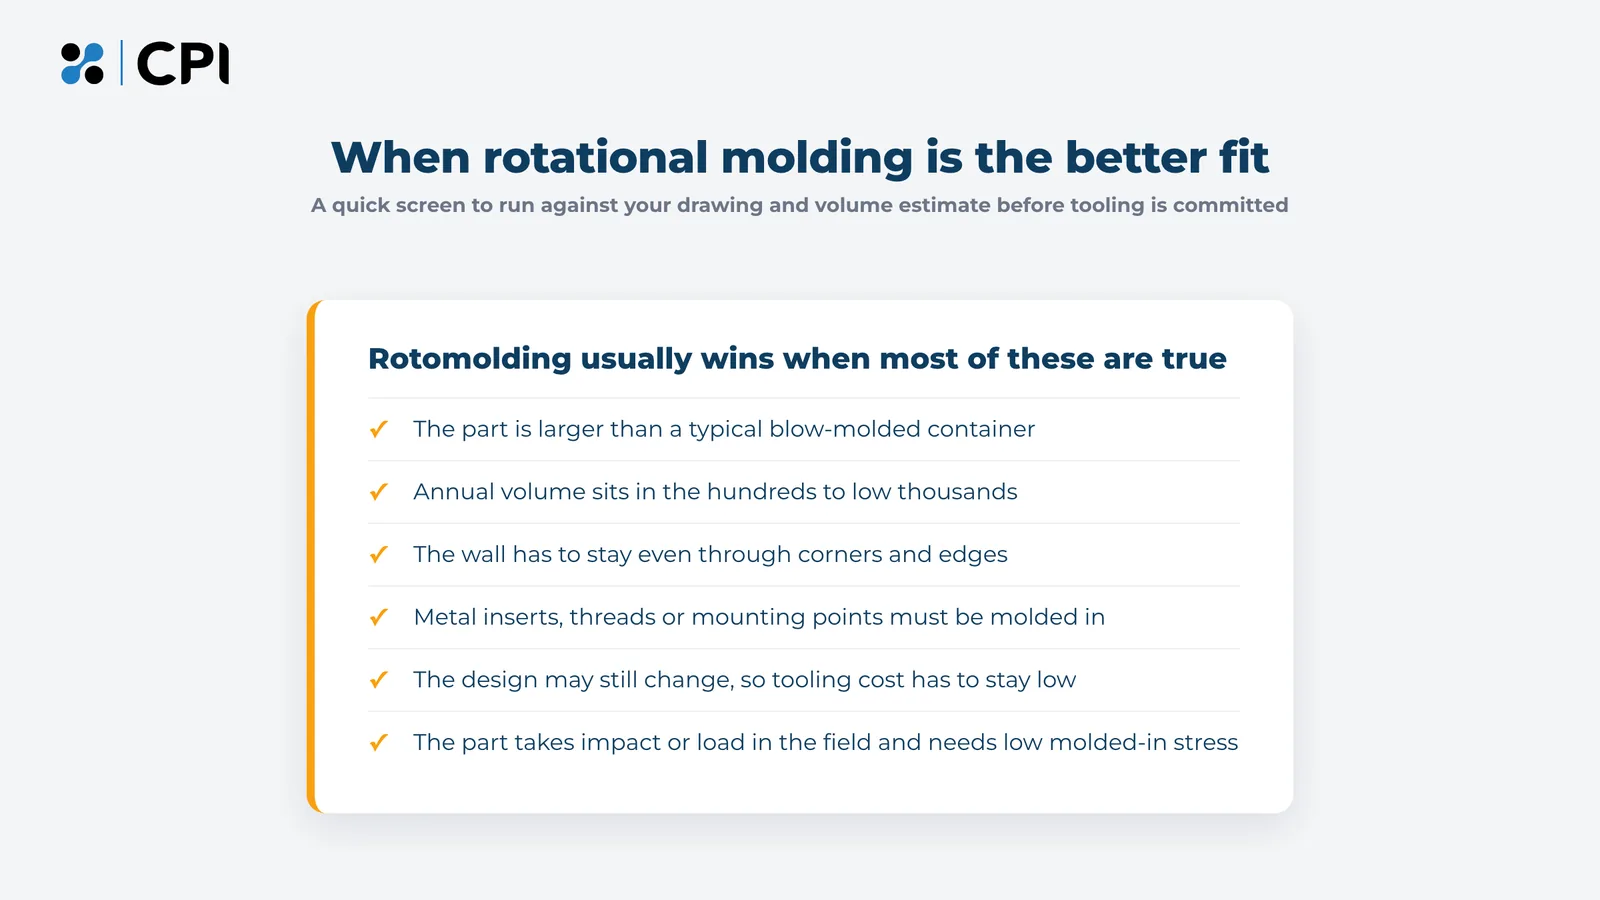
Rotational molding is right for most large, low-to-mid-volume hollow parts that need even walls, molded-in features or a design that may still change. Blow molding is right for small-to-mid hollow parts at high volume with thin walls, precision openings or clarity requirements. Run the five checks below in order, and the answer usually becomes clear by the third.
Run the five checks in order
- Size: is the part larger than a drum or an IBC bottle? If yes, rotomolding.
- Volume: is realistic annual volume in the tens of thousands or more for a small-to-mid part? If yes, blow molding is likely cheaper over the program.
- Wall: does the part need even, thick walls through the corners, or does it take impact at the edges? If yes, rotomolding.
- Features: does it need metal inserts, double walls or foam fill (rotomolding), or clarity, a precision neck or a multilayer barrier (blow molding)?
- Design stability: is the design likely to change in the first year? If yes, the lower and more modifiable tooling of rotomolding reduces the risk.
Bring the drawing and the volume to the conversation
Send any supplier you are evaluating three things: the drawing or a 3D model, a realistic annual volume with a range, and a list of the features that have to be molded in. A supplier that runs only one process should still tell you plainly when your part belongs in the other one.
When do injection molding or thermoforming beat both?
Injection molding beats both when the part is solid or open-sided, needs tight tolerances throughout, and runs at very high volume. Thermoforming beats both when the part is a large, open-faced shape such as a panel, tray, cover or liner, and only one side has to be formed precisely.
Some parts reach the blow-versus-roto question when neither process is the best fit:
- Injection molding: solid parts, small housings, clips and parts with fine detail on every surface. Tooling is the most expensive of the four processes, and unit cost at very high volume is the lowest. Rotomolding vs. Injection Molding: Process Differences and Design Considerations covers that comparison in detail.
- Thermoforming: large, open, sheet-based shapes such as covers, panels and trays. It cannot make a closed hollow part in one piece, but for an open shape it can be faster and cheaper than either hollow-part process.
- Twin-sheet thermoforming: two formed sheets fused into a hollow part. It competes with both processes for some large, flat hollow parts at mid volume.
If your part is open on one side, include thermoforming in the comparison. If it is solid and small, include injection molding. The blow-versus-roto decision only applies to parts that have to be hollow and closed.
Where to start with your part
Put the drawing next to a realistic annual volume and run the five checks. If the part is large, needs even walls through the corners, or carries molded-in hardware, and the volume sits in the hundreds to low thousands, rotational molding is likely the right process. If it is small, thin-walled and headed for tens of thousands of units a year, blow molding probably is.
Make the call before tooling is committed. Changing processes after a mold is cut costs far more than an extra week of comparison at the drawing stage.
Have a part that has to survive the field?
Send us your drawing and volume estimate, and we will tell you plainly whether rotomolding fits the part before you commit to tooling.